Setting up your custom domain with Namecheap and Netlify
Published on Mar 27 2022
Last updated on Apr 23 2024
In this tutorial, we will walk through how to set up a website with Namecheap and Netlify. This article assumes you have a basic understanding of domains and web deployment with a source code ready to deploy. If you would like to read more about web deployment, check out this blog post.
Step 1: Purchase a domain from Namecheap.
After creating and logging into your own account on namecheap.com, click on the "Domains" page. Here you can purchase an available domain name. You can use the search bar at the top of the page to search for a specific domain name, or you can browse through the different domain name extensions (e.g., .com, .net, .org) to find an available domain. Once you have found a domain name that you like, add it to your cart and proceed to checkout to purchase it.
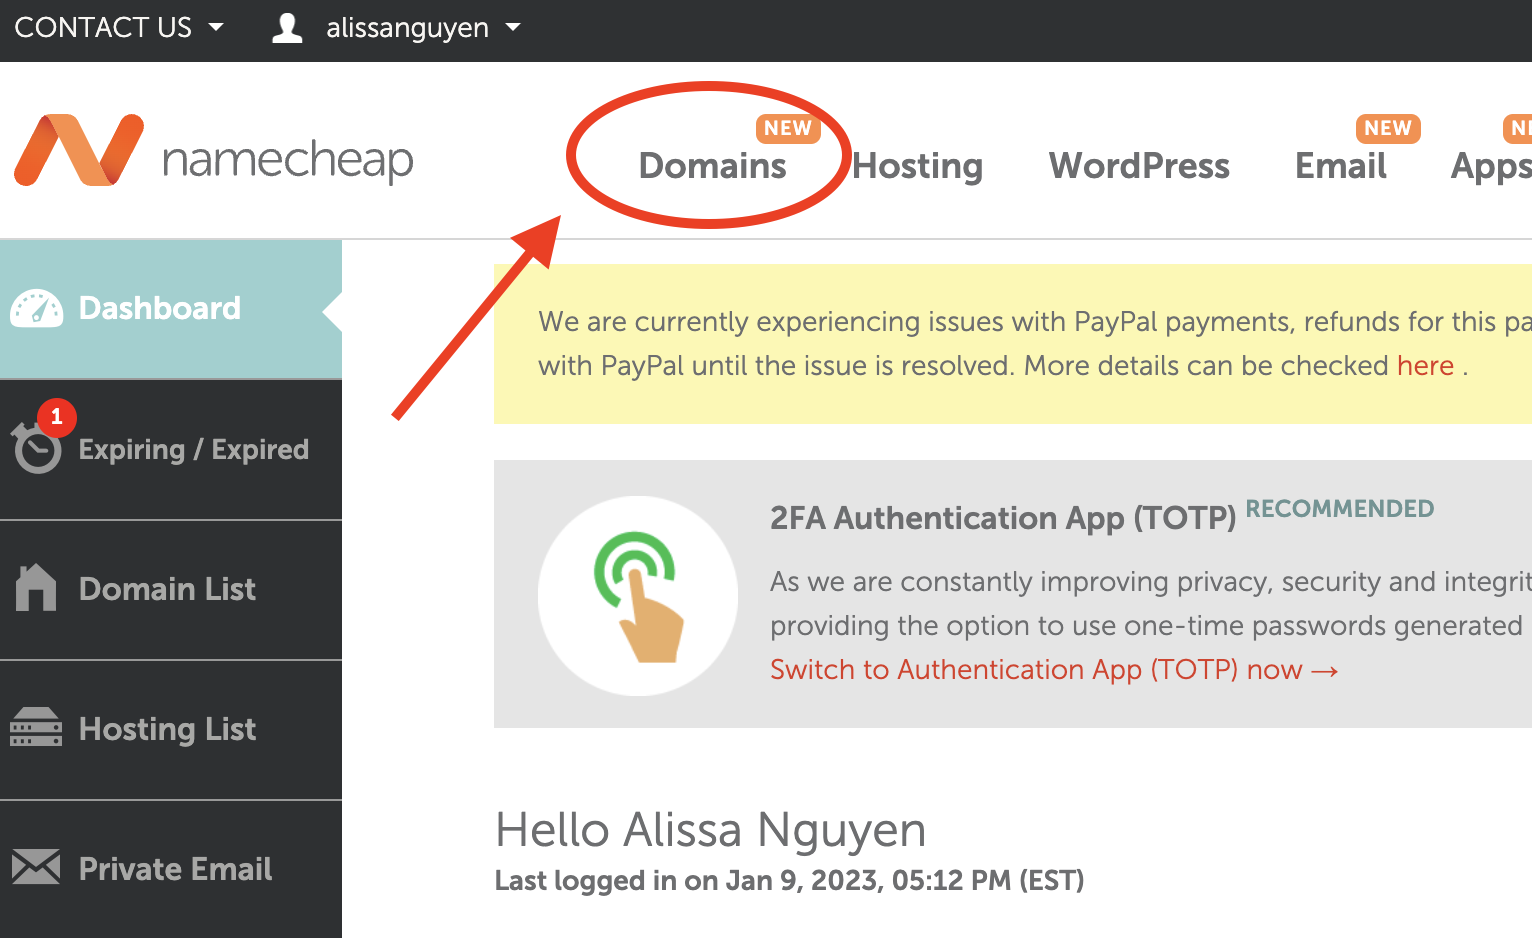
Once you have purchased a domain name, you will need to set up a hosting service for your website. Netlify is a popular hosting service that is easy to use and has a free plan available.
Step 2: Sign up for a free account on Netlify.
If you have already created an account with Netlify, you can skip this step.
Go to Netlify website and click on the "Sign up" button in the top right corner. Follow the prompts to create a new account. You will need to provide your email address and create a password. You can also sign up with your GitHub, GitLab, or Bitbucket account if you prefer.
Step 3: Connect your website's code to netlify
In the Netlify dashboard, click on the "Add new site" button, then click on "Import an existing project". This will open a page where you can choose the Git provider (e.g., GitHub, GitLab, Bitbucket) that you want to use to host your site's code.
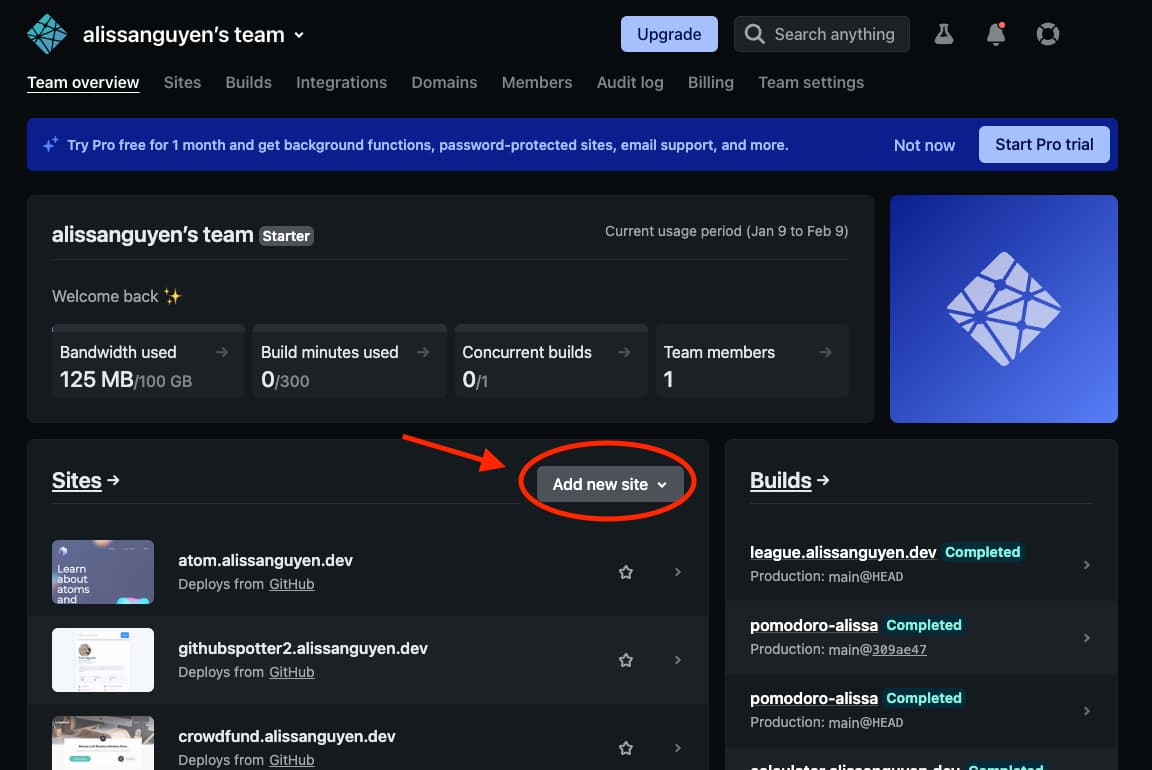
Follow the prompts to connect your Git provider and select the repository that contains your site's code. You will need to authorize Netlify to access your repository. If you are using GitHub, you will need to grant Netlify access to your repositories by clicking on the "Authorize netlify" button and following the prompts. If you are using GitLab or Bitbucket, you will need to provide your login credentials and grant Netlify access to your repositories.
On the "Build options and deploy" page, enter the build command and publish directory for your site. These will depend on the static site generator you are using (e.g., for Jekyll, the build command is "jekyll build" and the publish directory is "./_site"). The build command is the command that Netlify will use to build your site, and the publish directory is the directory where the built site will be stored.
Step 4: Deploy your site with Netlify
Click on the "Deploy site" button to build and deploy your site to Netlify. This may take a few minutes, depending on the size of your site and the build process.
Step 5: Connect your Netlify site to your Namecheap domain
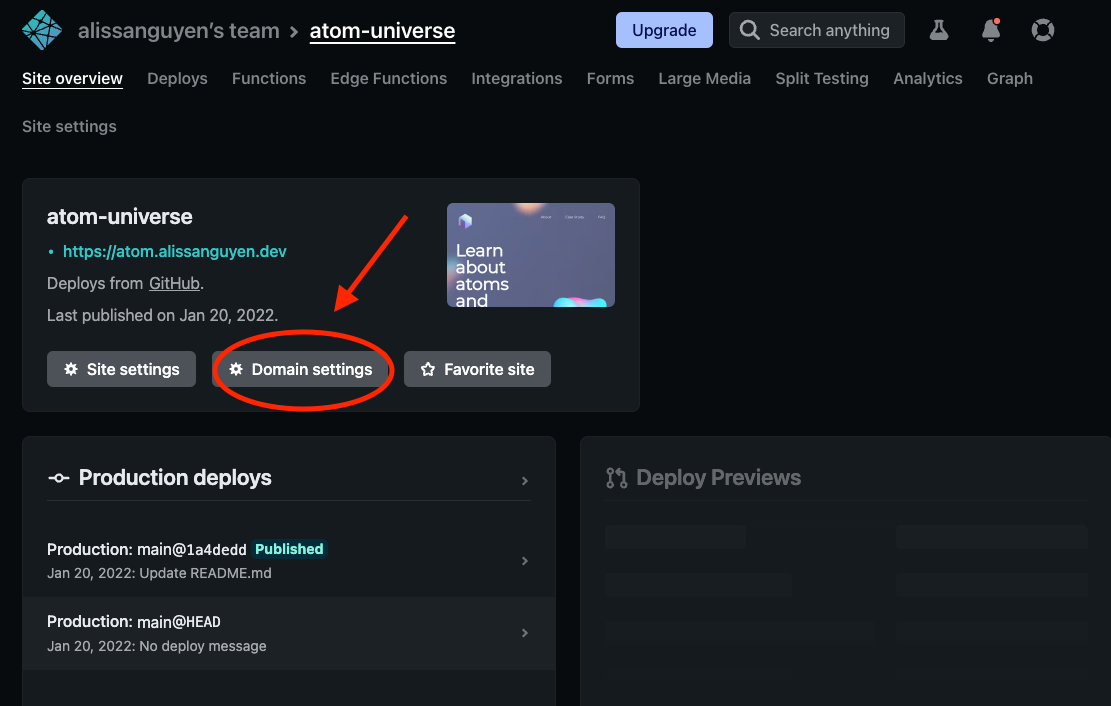
In the Netlify dashboard, click on the "Domain settings" tab for your site. This will open a page where you can manage the domain names for your site.
Click on the "Add custom domain" or "Add domain alias" button and enter your custom domain that you purchased from Namecheap. Here I already set up my custom domain that I purchased from Namecheap, which is alissanguyen.dev.
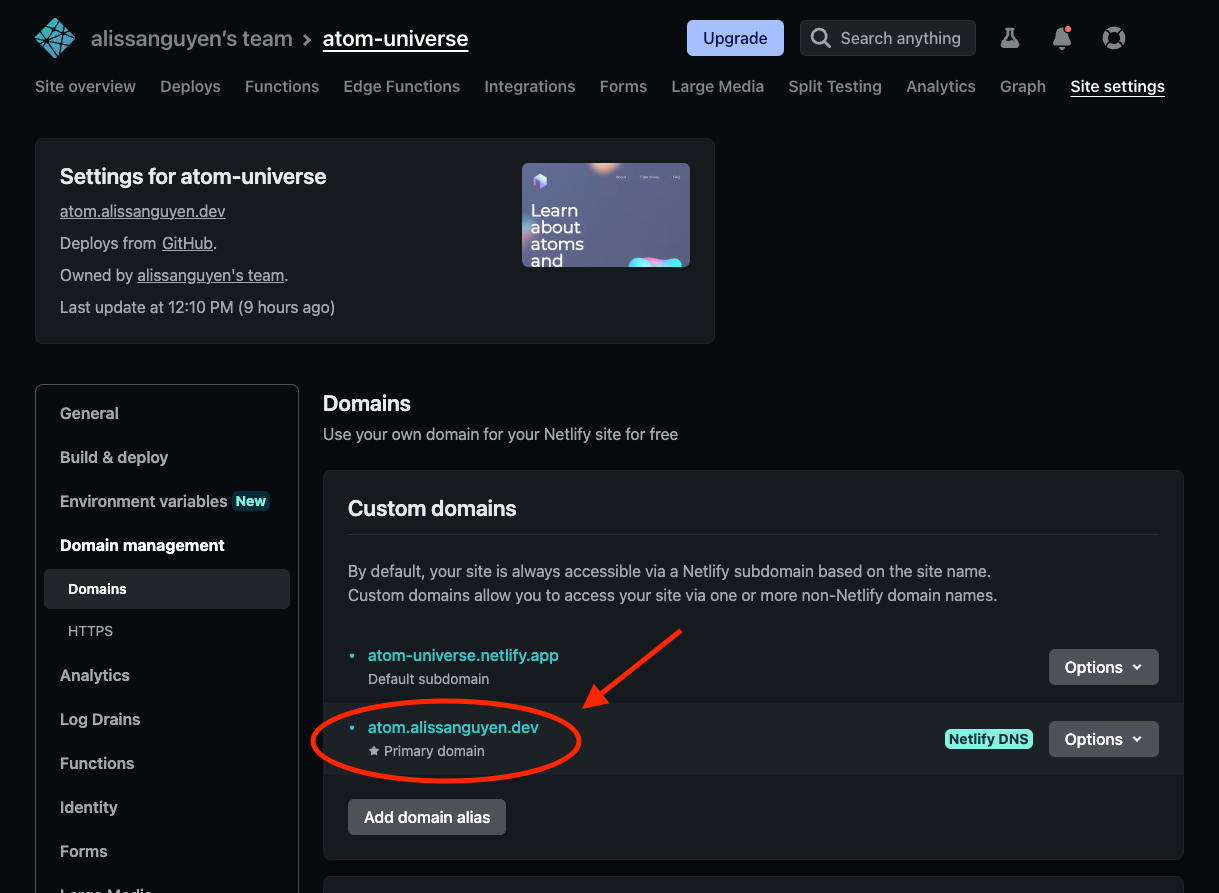
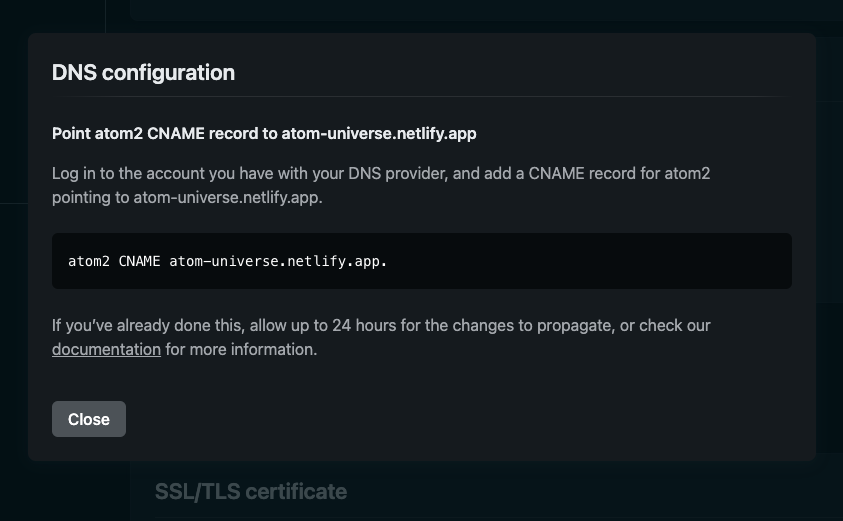
Netlify will provide you with the DNS records that you need to add to your Namecheap account in order to connect your custom domain to your Netlify site. These may include an A record, CNAME record, and/or TXT record. In this case, I attempted to add another custom domain and Namecheap provided me with a CNAME record.
Step 6: Connect your DNS records to your Namecheap domain
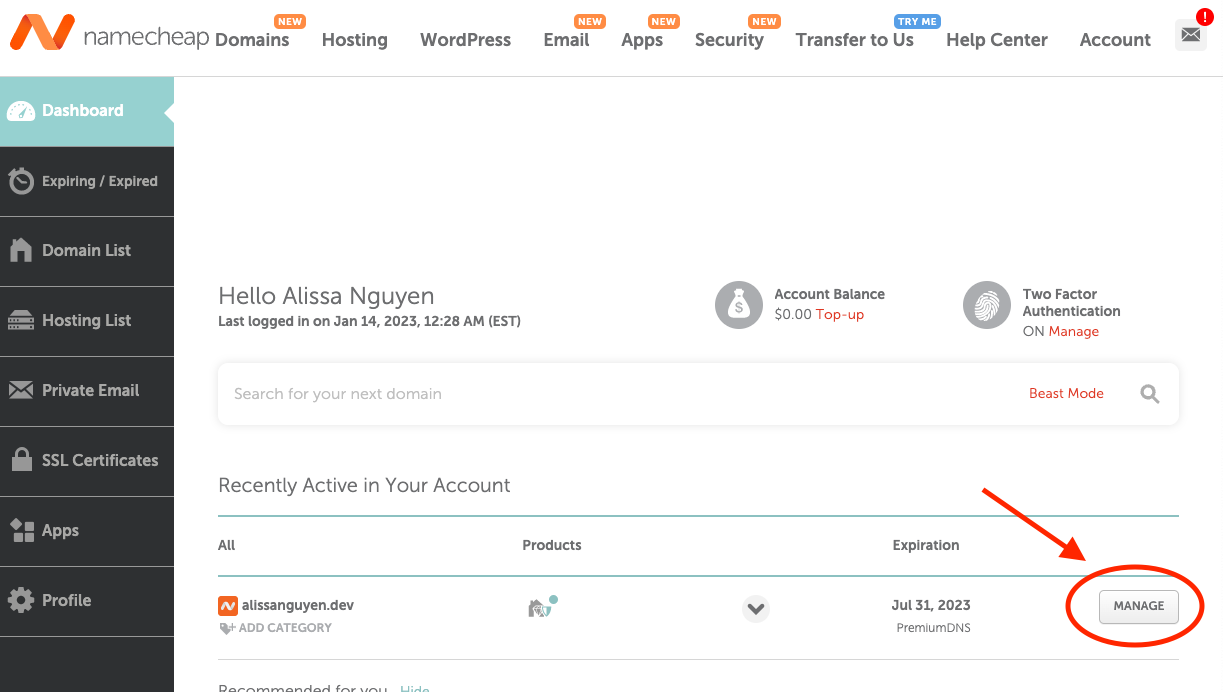
In your Namecheap account, click on the "Manage" button for the domain that you want to connect to Netlify. This will open the domain management page.
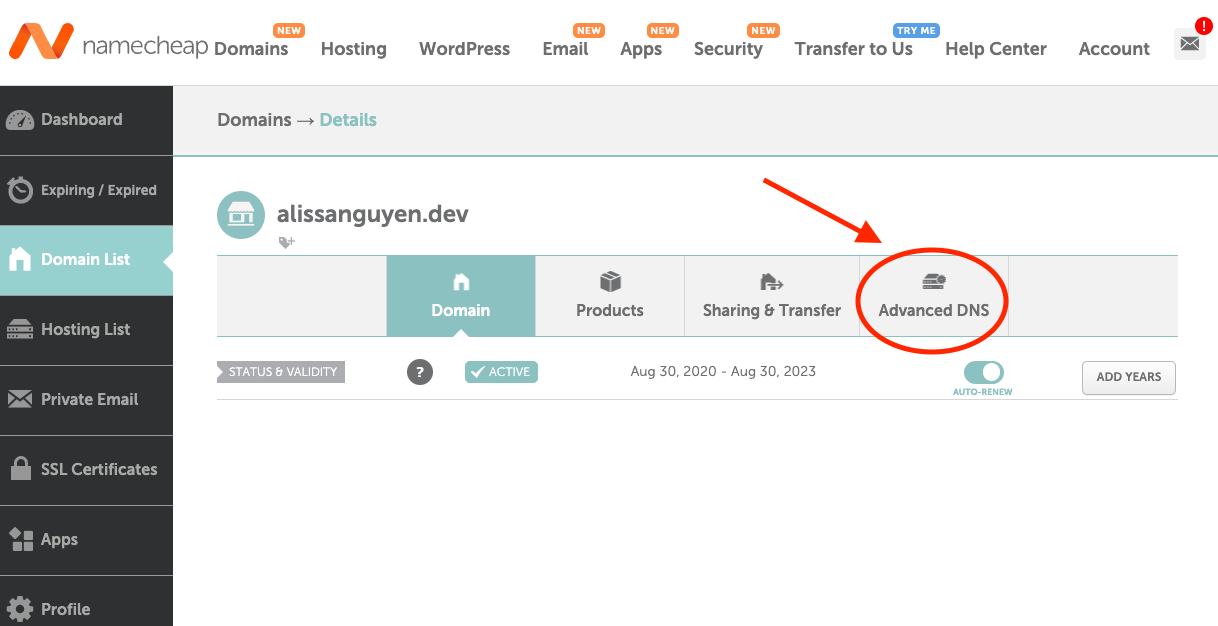
Click on the "Advanced DNS" tab and add the DNS records provided by Netlify. To do this, scroll down to the "Host Records" section and click on the "Add New Record" button. Select the record type (e.g., A, CNAME, TXT) from the dropdown menu and enter the values provided by Netlify in step 5. Click on the "Save Changes" button.
After completing this step, you should see your website with the custom domain working after 24 hours or less.
Conclusion
By following the steps outlined in this tutorial, you should now have a fully functional website that is hosted on Netlify and accessible through your domain name. If you have any trouble setting up your website or have any questions, don't hesitate to reach out for help. Good luck with your new website!

Written by Alissa Nguyen
FollowAlissa Nguyen is a software engineer with main focus is on building better software with latest technologies and frameworks such as Remix, React, and TailwindCSS. She is currently working on some side projects, exploring her hobbies, and living with her two kitties.
Learn more about me
If you found this article helpful.
You will love these ones as well.
