Scroll Tracker/Indicator with React and TypeScript
Published on Mar 31 2022
Last updated on Apr 05 2022
A scroll indicator helps users know how far down the page they have scrolled. It is also a fun way to decorate your website or blog. Although it might look hard, creating one will be as easy as pie if you follow this tutorial.
🧐 Also, did you notice something❓
✨ Yes, my blog post has this! You can see how the scroll indicator is in action as you read through the blog post! 🤩
Getting Started
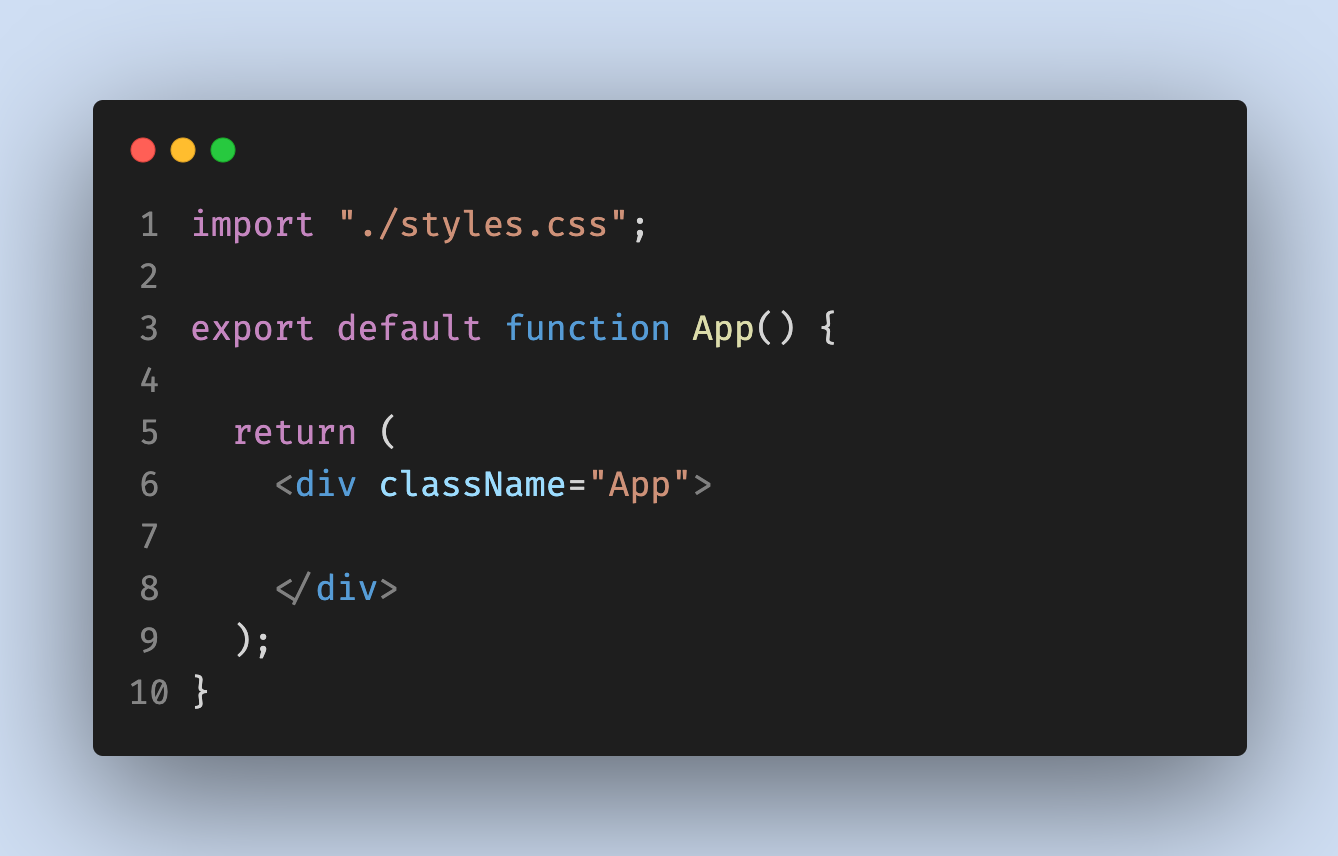
As indicated in the title, here I am using Create React App with TypeScript framework. In your App.tsx, you should start with something like this:

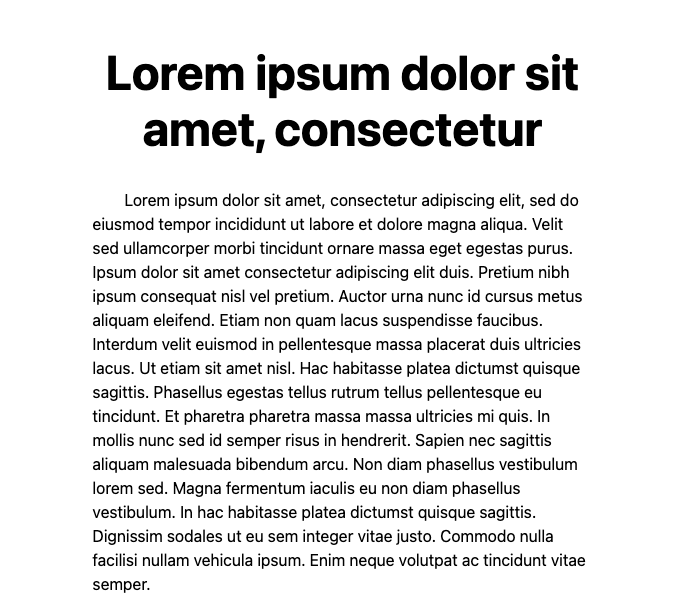
To better demonstrate the animation, I added about 10 lorem ipsum paragraphs to increase the height of the document and some extra stylings. You can expect the general structure of my `App.tsx` to look like this:

And the CSS Rules I use are:

At this point, you will have something like this:

Step 1: Create you Navigation Bar component
A general good rule-of-thumb is when creating a React component, you should create a new folder, which includes the component file and the component's style file.
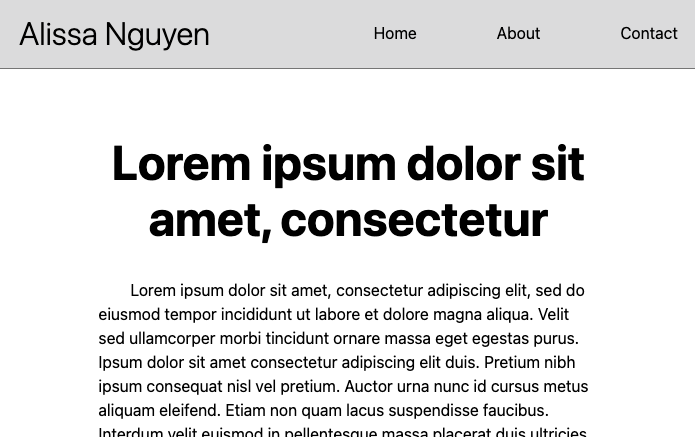
Here, I will create a NavBar component, it should look somewhat like this:
NavBar.tsx
1import React from "react";23interface Props {45}67const NavBar: React.FC<Props> = (props) => {8return (9<nav className="NavBar">10<span className="NavBar__Logo">Alissa Nguyen</span>11<ul className="NavBar__Links">12<li className="NavBar__Link">Home</li>13<li>About</li>14<li>Contact</li>15</ul>16</nav>17);18};1920export default NavBar;21
You can add the below styling to make it looks better:
1.NavBar {2display: flex;3justify-content: space-between;4align-items: center;5padding: 10px 20px;6border-bottom: solid 1px gray;7}89.NavBar__Logo {10display: flex;11font-size: 2rem;12font-weight: 300;13margin-right: 2rem;14width: 20rem;15}1617.NavBar__Links {18display: flex;19gap: 5rem;20justify-content: flex-end;21align-items: center;22list-style: none;23}24
Then, add the NavBar component into your App.tsx:

Now to make the navigation bar sticks to the top of the window at all time, you add `position: sticky` to the CSS rules for NavBar.
styles.css
1.NavBar {2display: flex;3justify-content: space-between;4align-items: center;5padding: 10px 20px;6border-bottom: solid 1px gray;7position: fixed;8top: 0;9left: 0;10right: 0;11z-index: 2;12background-color: rgb(224, 224, 224);13}14
You now have a navigation bar component that will sticks to the head of the window no matter how far you scroll down the page.

Step 2: Create the Scroll Indicator component
Creating the scroll indicator component gives you more flexibility to customize its stylings. Below is how your ScrollIndicator.tsx should look like.

Then, attach the component to the bottom of the navigation bar with the below stylings:
styles.css
1.NavBar__ScrollIndicator {2background: linear-gradient(3217deg,4rgb(255, 230, 0) 20%,5#dd31ffcc 75%,6rgb(255, 0, 0) 100%7);8bottom: 0;9left: 0;10height: 5px;11position: absolute;12transition: 0.5s cubic-bezier(0.075, 0.82, 0.165, 1);13}
Notice that here the ScrollIndicator has a CSS rule of `position: absolute`, this will position the indicator relatively to the closest parent that has a `position: relative`, `position: fixed`, or `position: sticky` value. Since in step 1, our NavBar component has the rule `position: sticky` and is the closest parent to our indicator component, our ScrollIndicator will positioned with reference to our NavBar. We specify the final position of your indicator with values of top, right, bottom, and left.
Right now, you won't see anything on your screen yet, since the width of the scroll indicator is 0. Our next step is to create a trigger function to change the width of the scroll indicator.
Step 3: Create a function to update the scrolled amount to our progress indicator
If you aren't too familiar with React useState hook, this is a perfect opportunity to practice. Tracking the progress of your scroll indicator inside a state ensures instant update without affecting other elements on your website.
ProgressIndicator.tsx
1import React from "react";23interface Props {}45const ProgressIndicator: React.FC<Props> = (props) => {6const [progress, setProgress] = React.useState<number>(0);78return (9<div10className="NavBar__ScrollIndicator"11style={{12width: `${progress}%`13}}14></div>15);16};1718export default ProgressIndicator;19
To create the function that will update the scroll indicator of how much of the page the user has scrolled, we want to understand the steps to calculate the amount scrolled:
We find the height of the device's window and the height of the entire document.
We find how much the user has scrolled.
We calculate the percentage of the document that has been scrolled.
We update our
`progress`with the percentage calculated.
Below is the complete function:
ProgressIndicator.tsx
1function updateProgressIndicator() {2const windowHeight: number = window.innerHeight;3const documentFullHeight: number = document.body.clientHeight;45const scrolled: number = window.scrollY;67const percentageScrolled: number =8(scrolled / (documentFullHeight - windowHeight)) * 100;910setProgress(percentageScrolled);11}
Step 4: Trigger the function to animate the scroll indicator when user scrolls
In this step, we will be using React useEffect hook, I suggest you read more about it if you are not familiar with this hook.
1React.useEffect(() => {23updateProgressIndicator();45window.addEventListener("scroll", updateProgressIndicator);67return () => {8window.removeEventListener("scroll", updateProgressIndicator);9};10}, [progress]);
Then, add our useEffect hook to our ProgressIndicator component and we will have a complete scroll indicator component as below:
ProgressIndicator.tsx
1import React from "react";23interface Props {}45const ProgressIndicator: React.FC<Props> = (props) => {6const [progress, setProgress] = React.useState<number>(0);78function updateProgressIndicator() {9const windowHeight: number = window.innerHeight;10const documentFullHeight: number = document.body.clientHeight;1112const scrolled: number = window.scrollY;1314const percentageScrolled: number =15(scrolled / (documentFullHeight - windowHeight)) * 100;1617setProgress(percentageScrolled);18}1920React.useEffect(() => {21updateProgressIndicator();22window.addEventListener("scroll", updateProgressIndicator);2324return () => {25window.removeEventListener("scroll", updateProgressIndicator);26};27}, []);2829return (30<div31className="NavBar__ScrollIndicator"32style={{33width: `${progress}%`34}}35></div>36);37};3839export default ProgressIndicator;40
So how does this works?
Fundamentally, by using useEffect hook, you want React to do something to your component (our ScrollIndicator component) after it has been rendered. React will save the "effect" (which is the callback function) and call it after our component mounted (added in the DOM). In our useEffect, the callback function does 3 things:
It initially calls our function wrote in step 3. This will handle cases where the user refresh the page after they've scrolled halfway down the page. In those cases, they haven't scrolled yet but since we call our function, they will still see the progress indicator (assuming your web application remembers the user scroll position after refresh).
It will attempt to add an
EventListenerto our window, which will call ourupdateProgressIndicator()function every time the user scrolls.
It will return a function that will remove the
EventListenerabove from the window. When the callback function in a useEffect hook returns a function, it means React will call that function (returned from the callback) every time our component unmounted (removed from the DOM). Without doing this, theEventListenerwon't be removed, and so theupdateProgressIndicator()function will be called every time the user scrolls even when ourScrollIndicatordoes not exist in the DOM.
Hey, you're finished!
That's it for today's tutorial, you can see a complete demonstration below:

Written by Alissa Nguyen
FollowAlissa Nguyen is a software engineer with main focus is on building better software with latest technologies and frameworks such as Remix, React, and TailwindCSS. She is currently working on some side projects, exploring her hobbies, and living with her two kitties.
Learn more about me
If you found this article helpful.
You will love these ones as well.
